Through the content monitoring feature, you can track various data of influencer content (videos, image posts) in real-time, providing a clear view of promotional effectiveness. The monitored content is grouped by project dimensions, and users can create multiple monitoring projects as needed for management.
Project Creation and Management
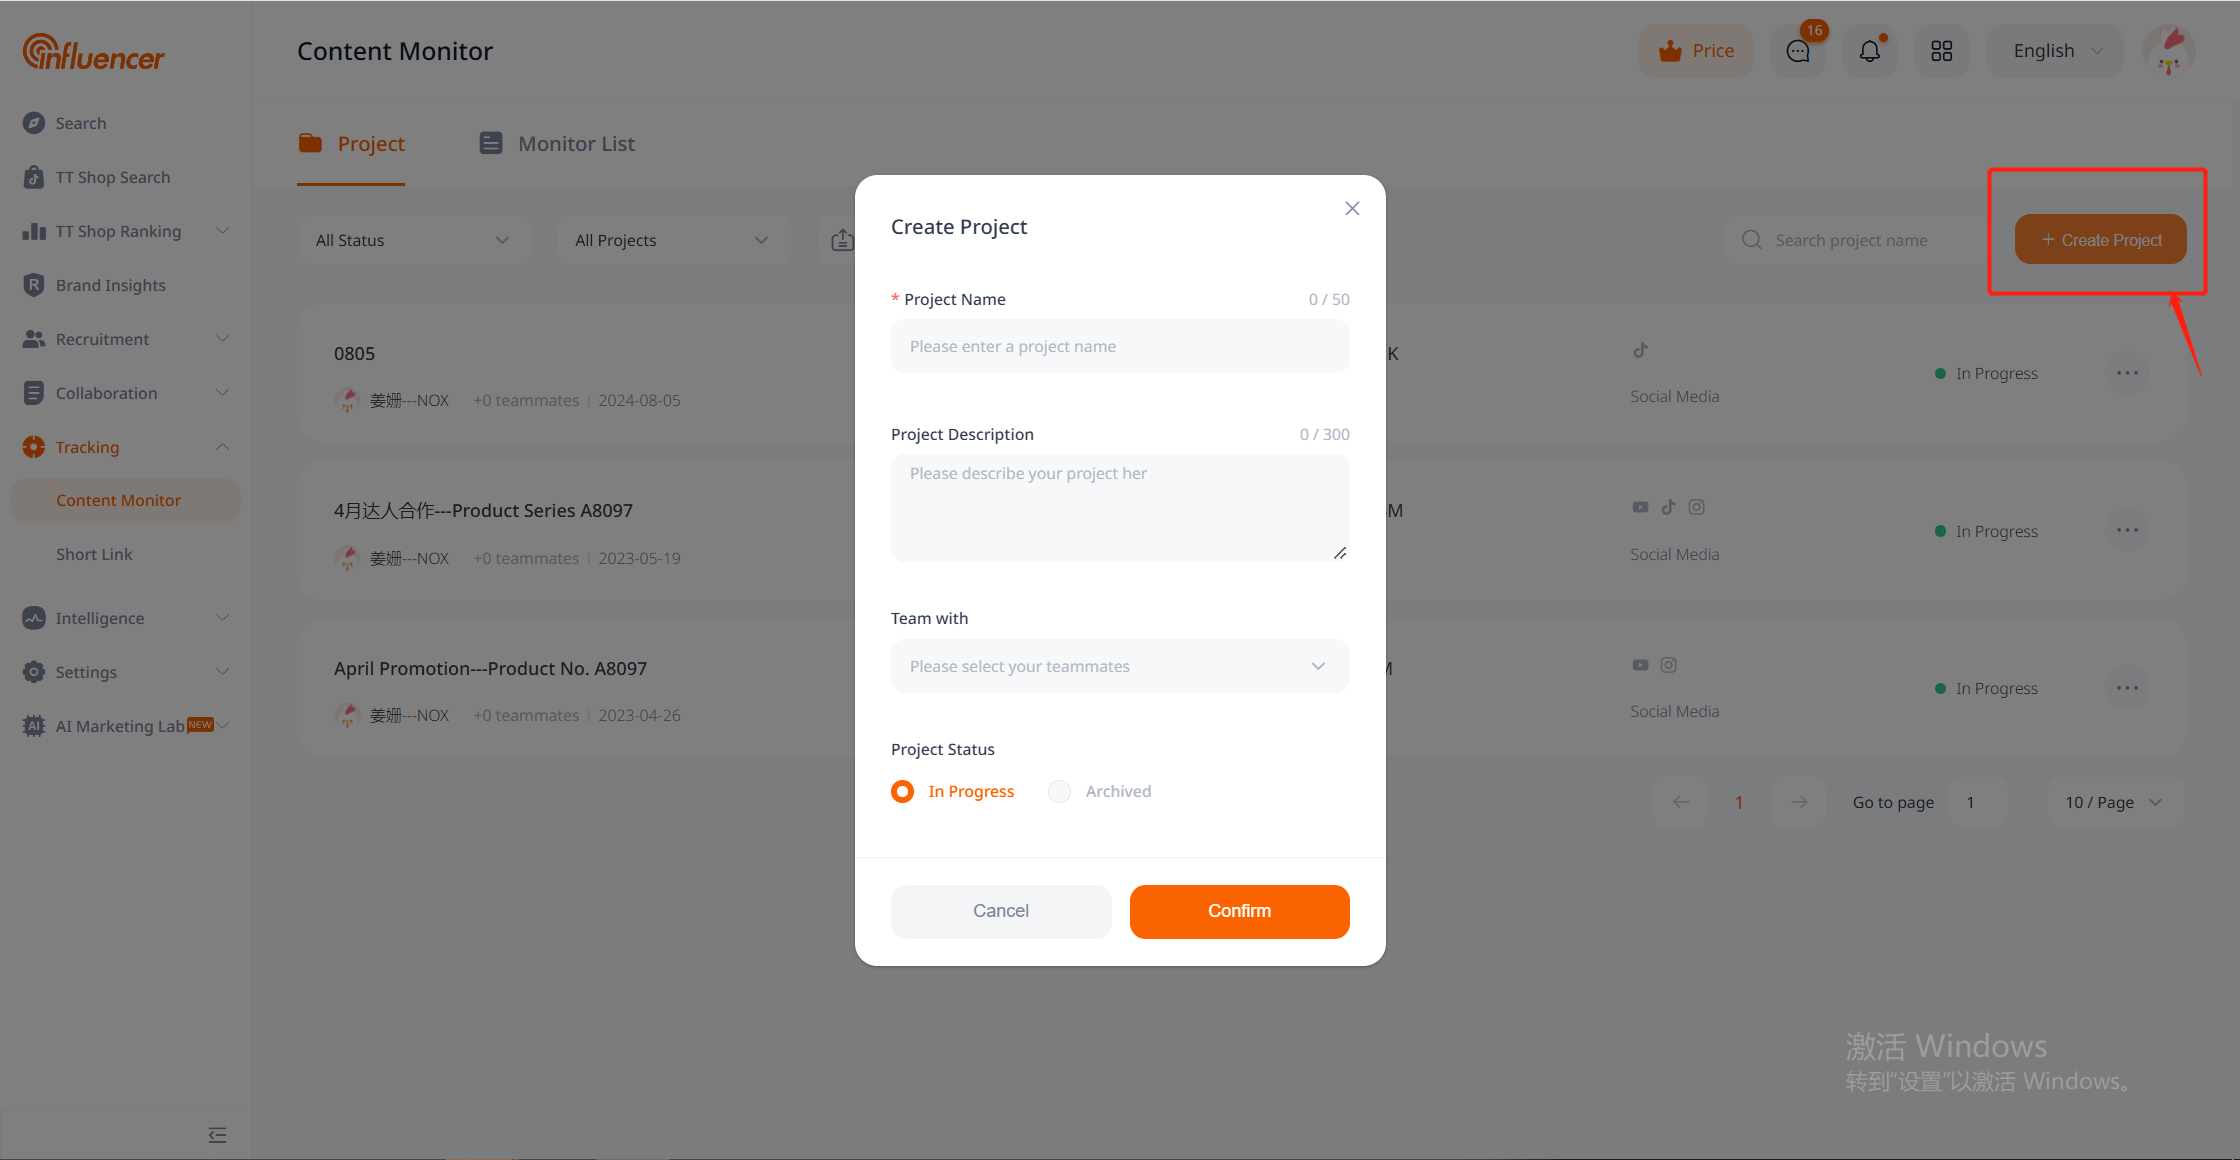
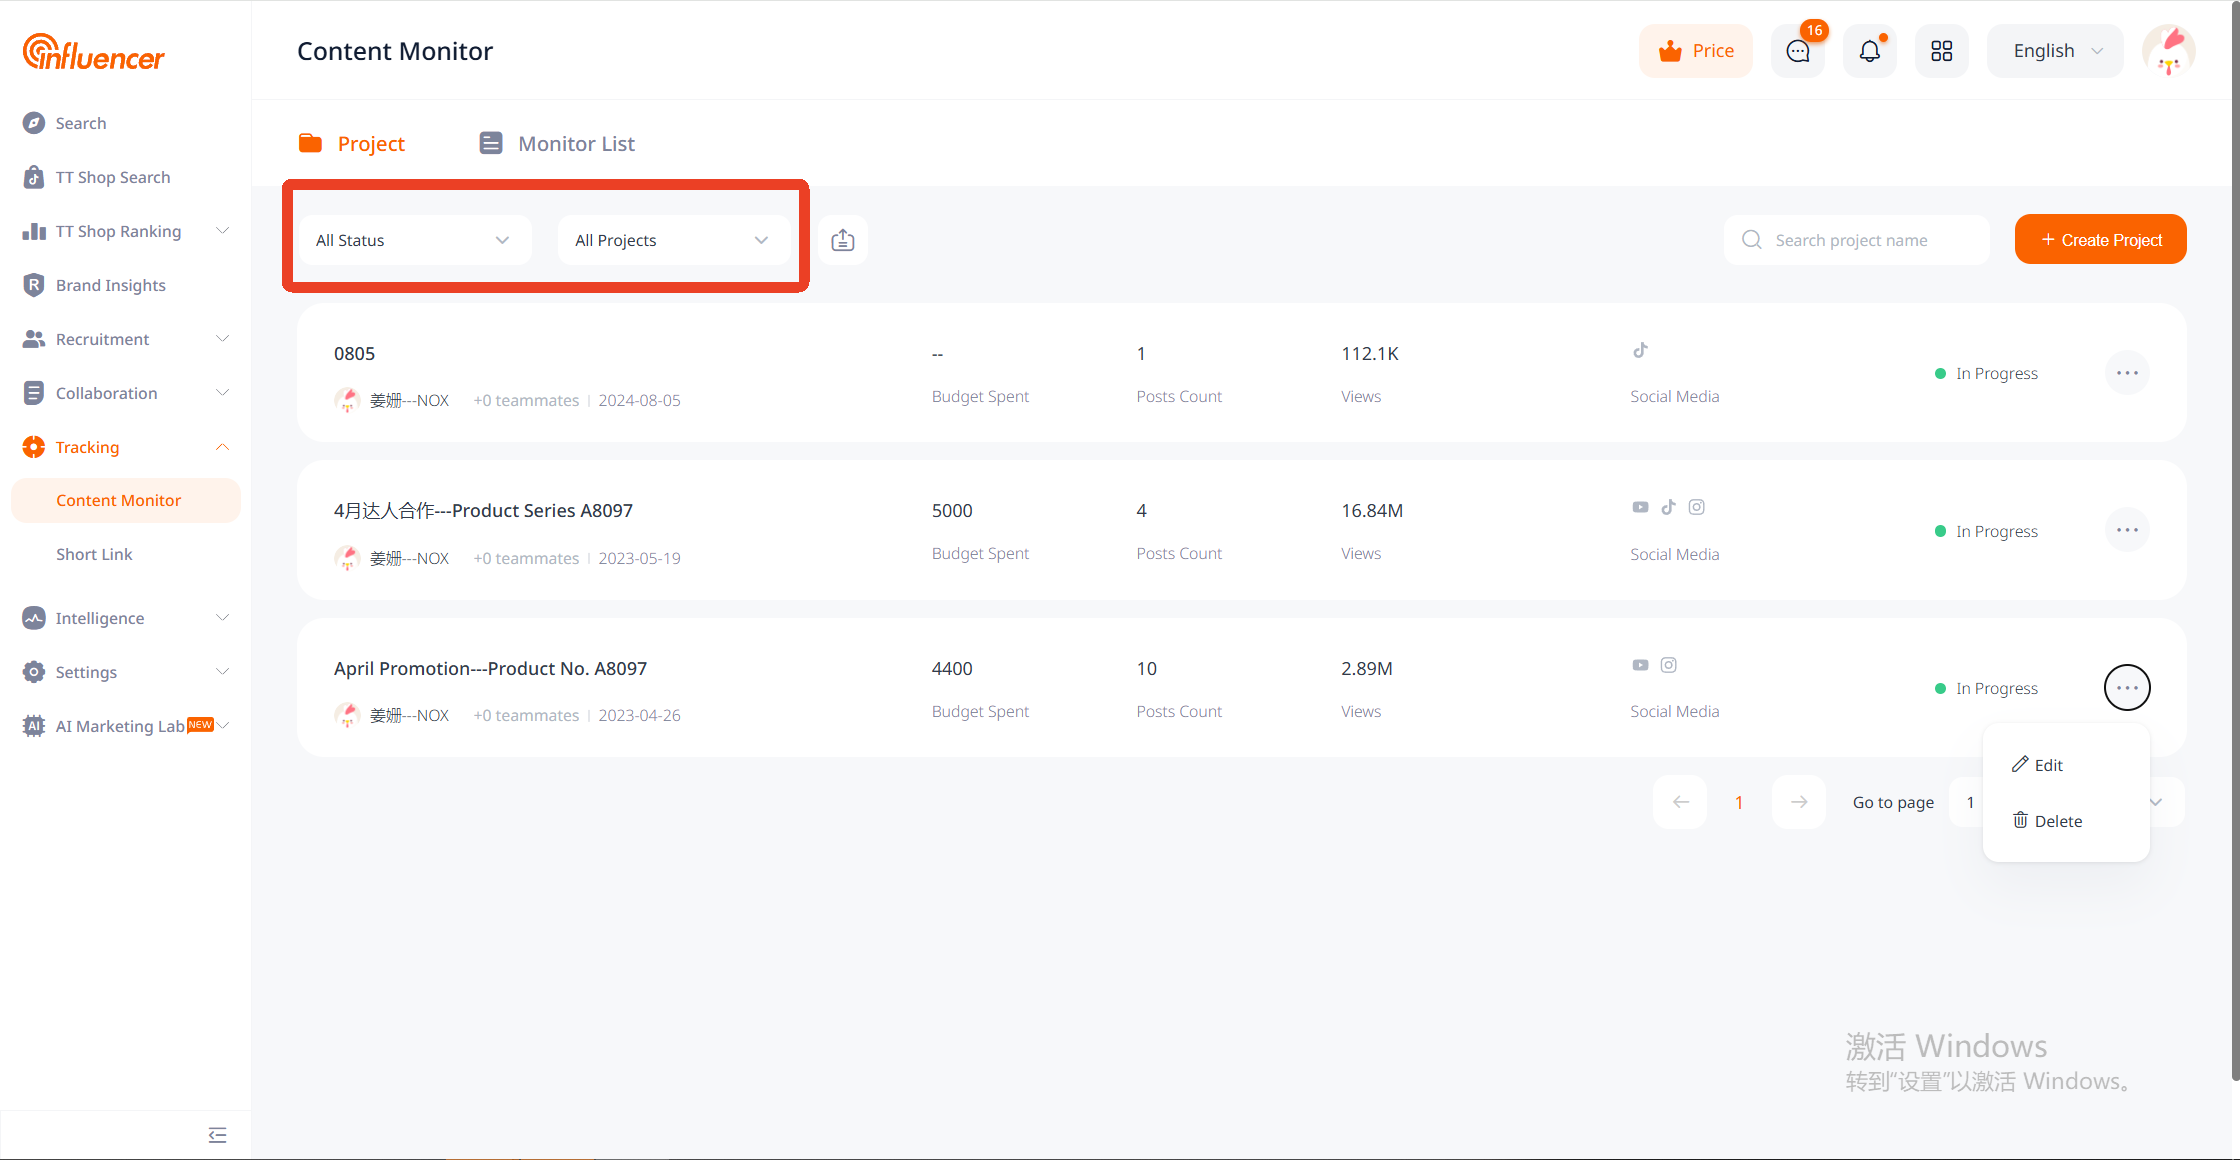
How to Create a Project
- Click “Create Project” in Effect Monitoring – Content Monitoring.
- Fill in the project name and other required information.
- Click “Confirm” to finalize.
Editing/Deleting Projects
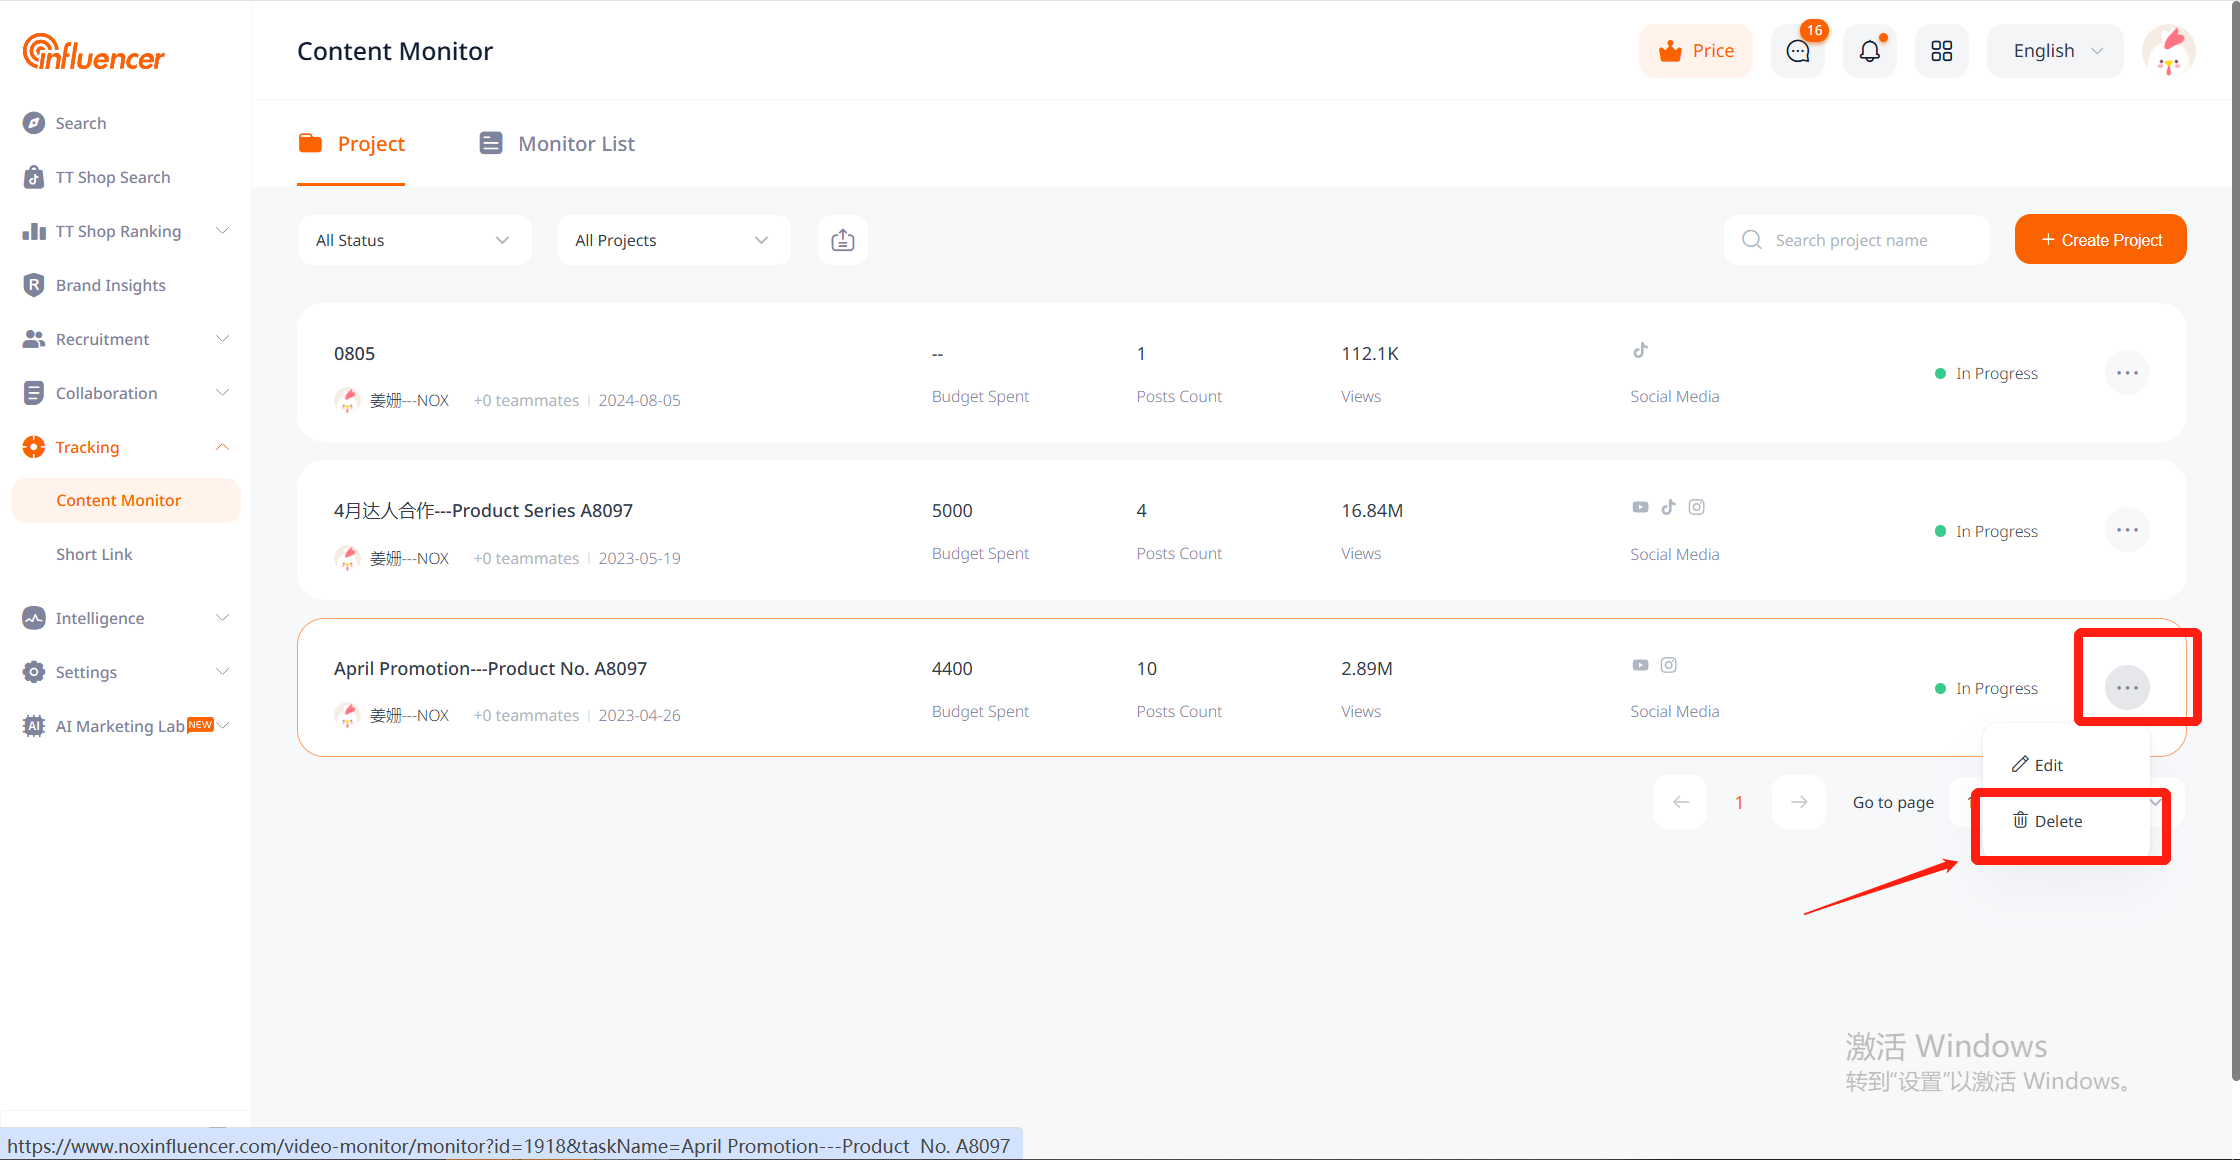
- Click the “…” icon on the right side of the project information to edit or delete the project. There is no limit to the number of projects you can create, but note that deleted projects cannot be recovered, so proceed with caution.
Project Filtering and Viewing
In the project list, users can filter and view projects by status, creator identity, and project name. Additionally, projects that have been “Archived” will be grayed out and moved below the “Ongoing” projects in the display order.
Adding Monitoring
How to Add Monitoring
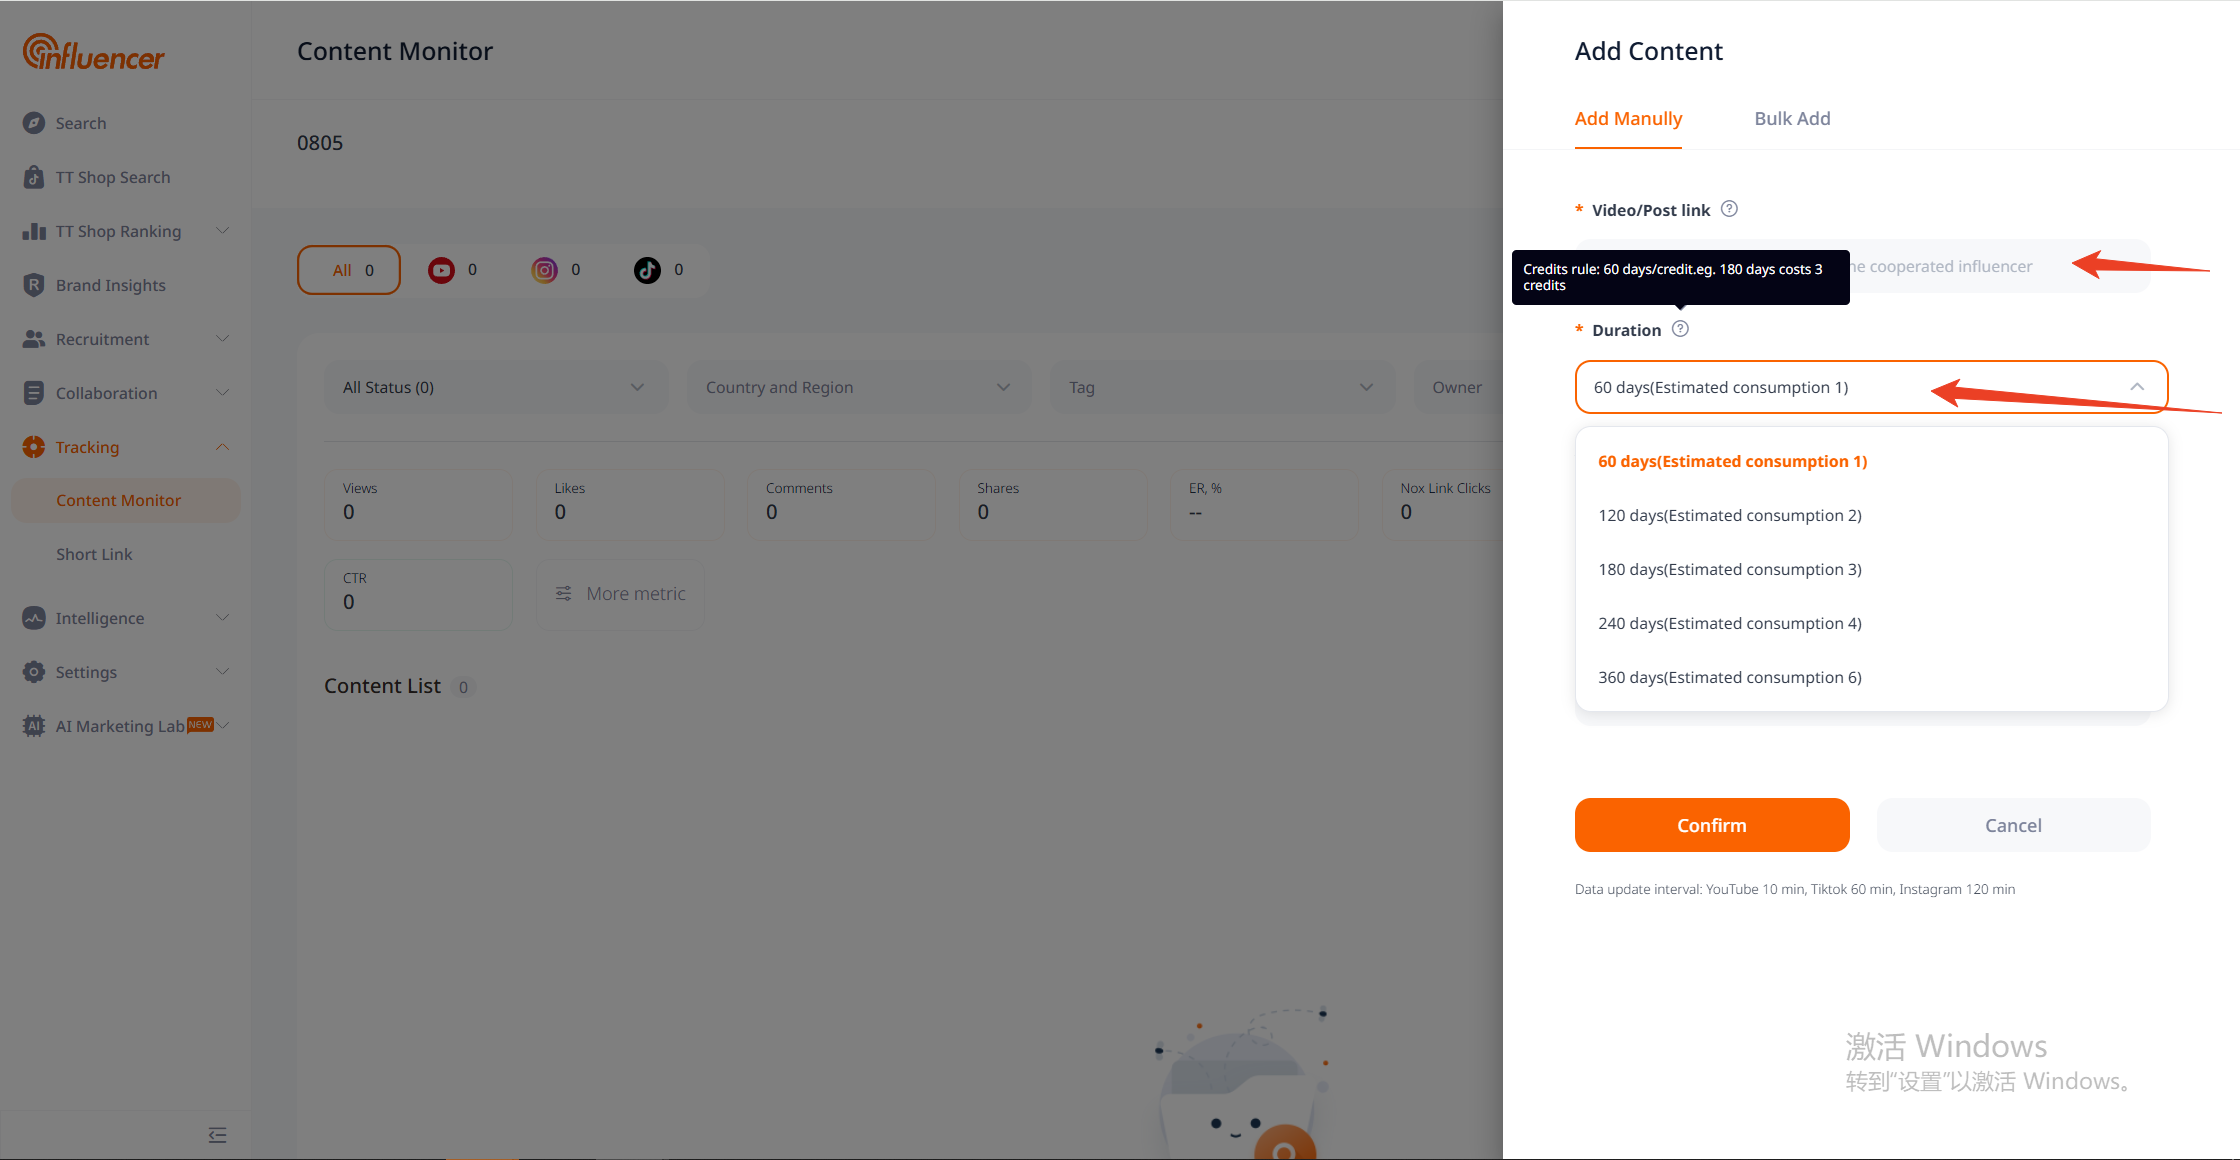
- On the monitoring page, click “Add Monitoring” to open the drawer page.
- Enter the publication link, monitoring duration, region, and Nox short link, among other details.
- Click “Confirm” to proceed. If monitoring large amounts of content, you can choose “Batch Add” and upload using Excel. For quota calculation, please refer to the content monitoring time change and quota calculation instructions.
When there is a lot of content to monitor, you can choose [Bulk Add] and upload in bulk via Excel. Please refer to the content monitoring duration changes and quota calculation instructions for quota calculation methods.
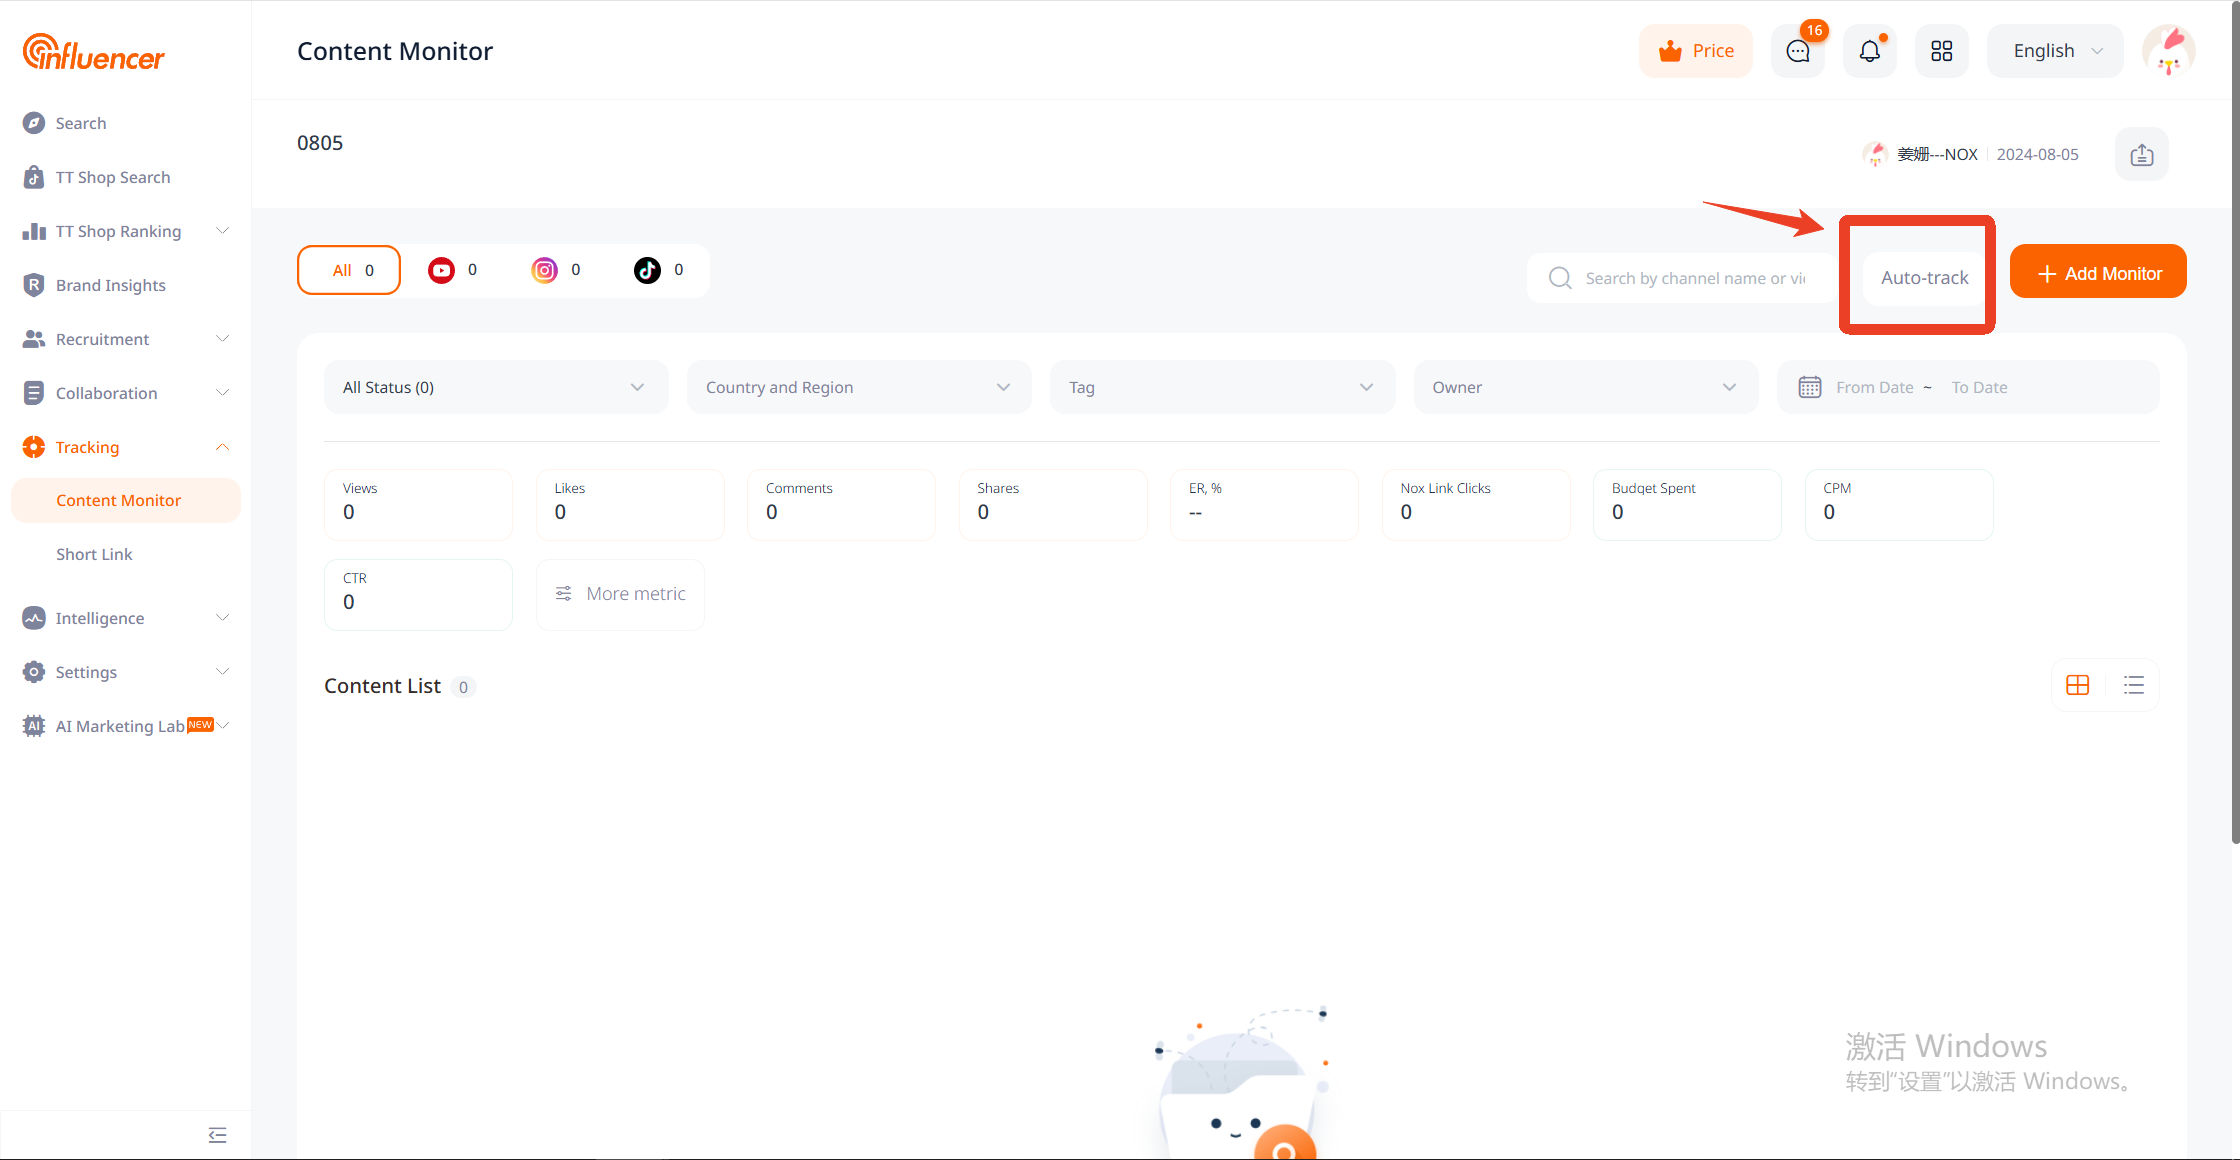
In addition to adding monitoring through content publication links, users can also use the auto-tracking feature to automatically track and monitor upcoming content. Once created, if an influencer publishes content with a Nox short link or monitoring keyword within the auto-tracking window period (default is 7 days), the system will automatically start monitoring the content (default monitoring time is 60 days). Note: This is an advanced feature and requires a Premium Enterprise Edition or higher for support. If content tracking begins, it will consume the quota for promotional content monitoring.
Method for Creating Auto Tracking
- On the monitoring page, click [Auto Tracking] to open the drawer page
- Fill in the influencer name/link, Nox short link, monitoring keywords, etc.
- Click [Confirm] to complete
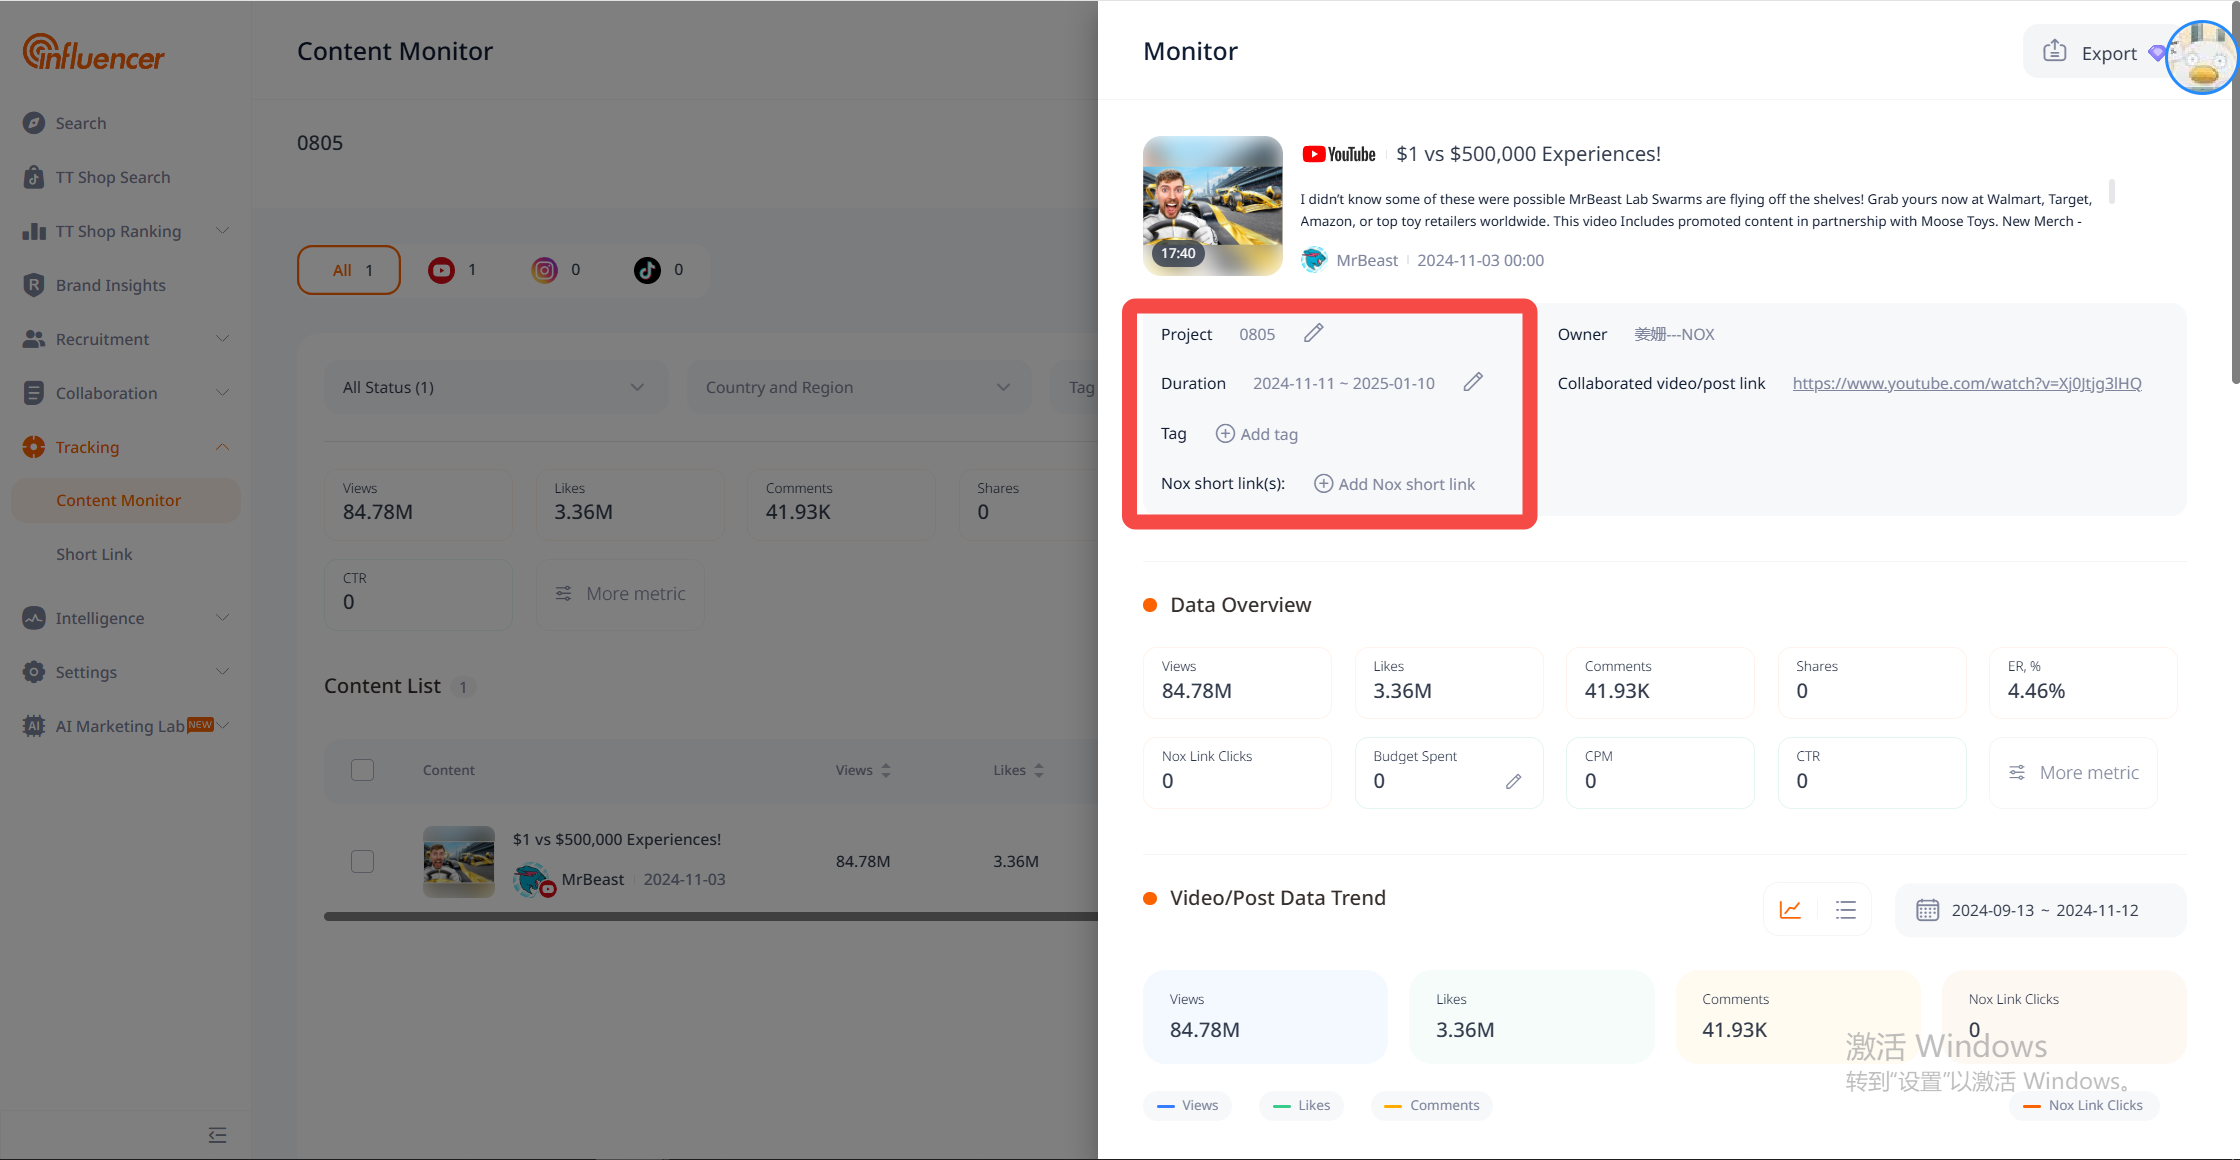
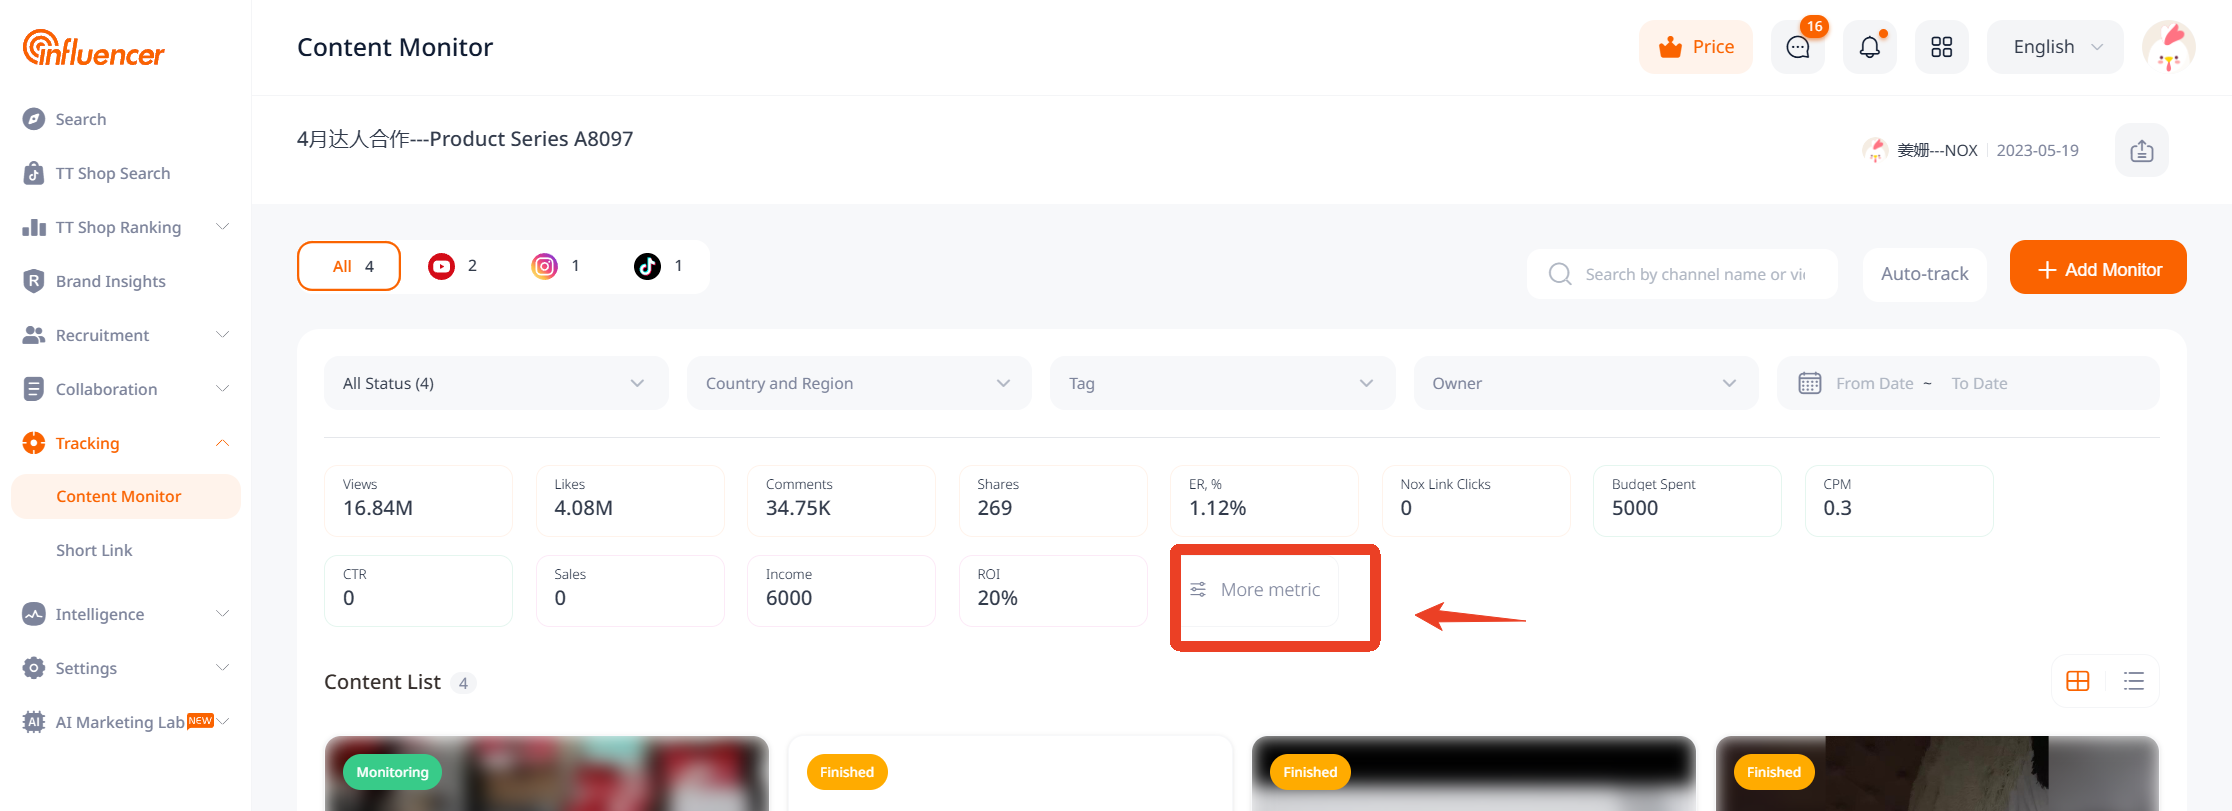
Monitoring Details
Click on the monitored content to view monitoring details, which include a data overview, trends of video/post data, distribution of Nox short link clicks (location and device), comment sentiment analysis, and frequent comment words.
Some fields in the data overview (e.g., budget consumption, installations, sales, revenue, etc.) support manual input by users. After input, the system will automatically calculate related data, facilitating a comprehensive understanding of the effectiveness of cooperative content.
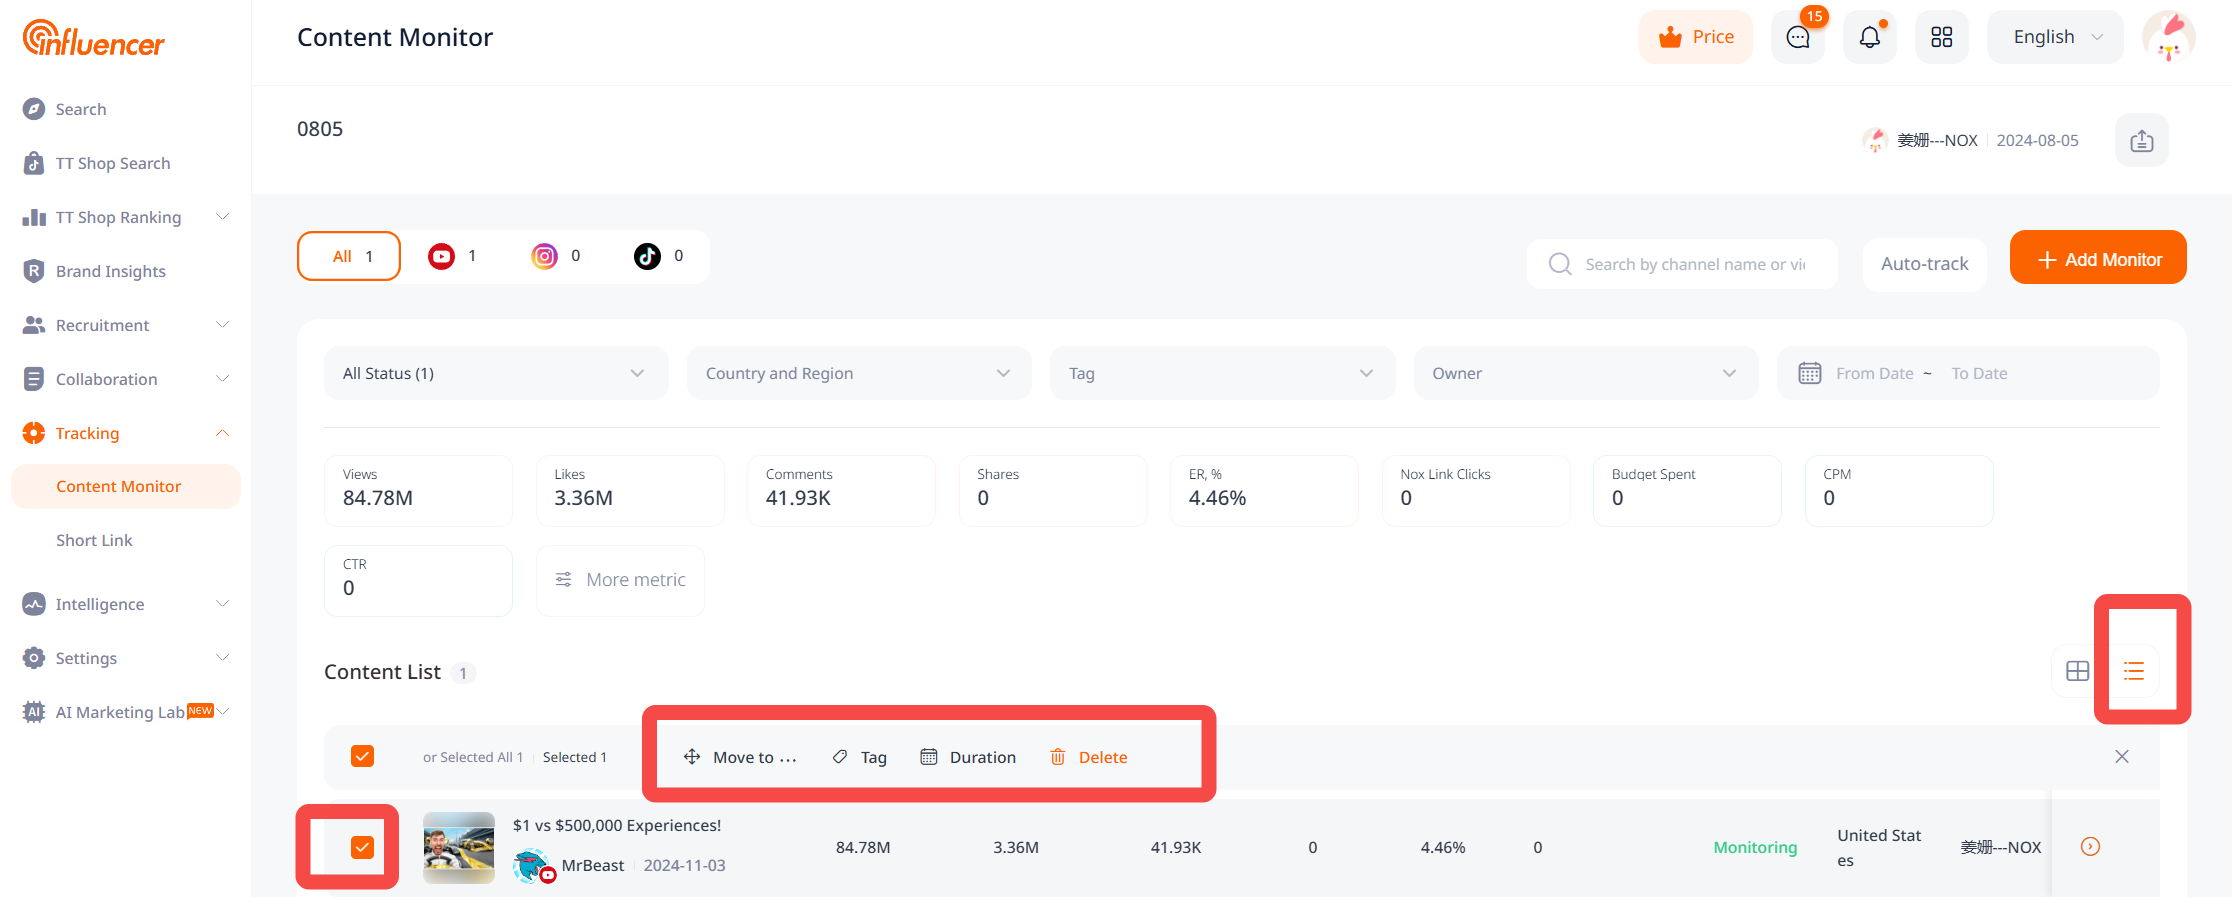
Monitoring Content Management
For content in the monitoring list, users can perform multi-dimensional filtering, as well as move content between projects, add custom tags, modify monitoring duration, delete, etc.
If you need to batch process monitored content across multiple projects, you can do so in the main monitoring list.